
Guided Installer
A reference for the Cerb guided installer
Cerb provides a guided installer that verifies your requirements, initializes the database, and walks you through the initial configuration of the software.
- When the database step completes on its own
- Step 1: Environment
- Step 2: License
- Step 3: Database
- Step 4: Account
- Step 5: Packages
- Step 6: Complete
- If the installer says the installation already exists
- References
To start the installer, open your browser to the location where you downloaded Cerb. For instance:
http://localhosthttps://support.example.com/https://example.com/cerb/
You don't need to type /install/ yourself. Until the database is populated, Cerb redirects you there from any location.
The progress bar across the top of the installer shows six steps, and the headings below match it. Depending on how you installed, some of them do their work without asking you anything – see when the database step completes on its own.
When the database step completes on its own
If Cerb's configuration already holds the database connection settings when the installer starts, step 3 finds them, skips its form, and imports the schema without asking you anything.
What you see in its place is a card reading "Please wait…", with no progress bar on it at all. It appears twice, and on quick hardware the first one goes by too fast to read. That's expected – the schema import is the slowest part of the install, and it's the one moment the installer needs nothing from you. Step 4 is skipped along with it, since there's no configuration left to write. That makes five screens you interact with rather than six.
Both Docker installations work this way, by different means – the pre-built image renders its configuration from the environment at startup, and the source installation has a cerb-config service that does the same before anything else runs. On either, clicking I Accept takes you straight to the account form.
A bare-metal installation doesn't. If the Database form appears and asks you for a host, database name, username and password, nothing has gone wrong – the settings simply weren't written for you. Fill them in as you would on any other installation and read the rest of step 3 below; you're on the six-screen path.
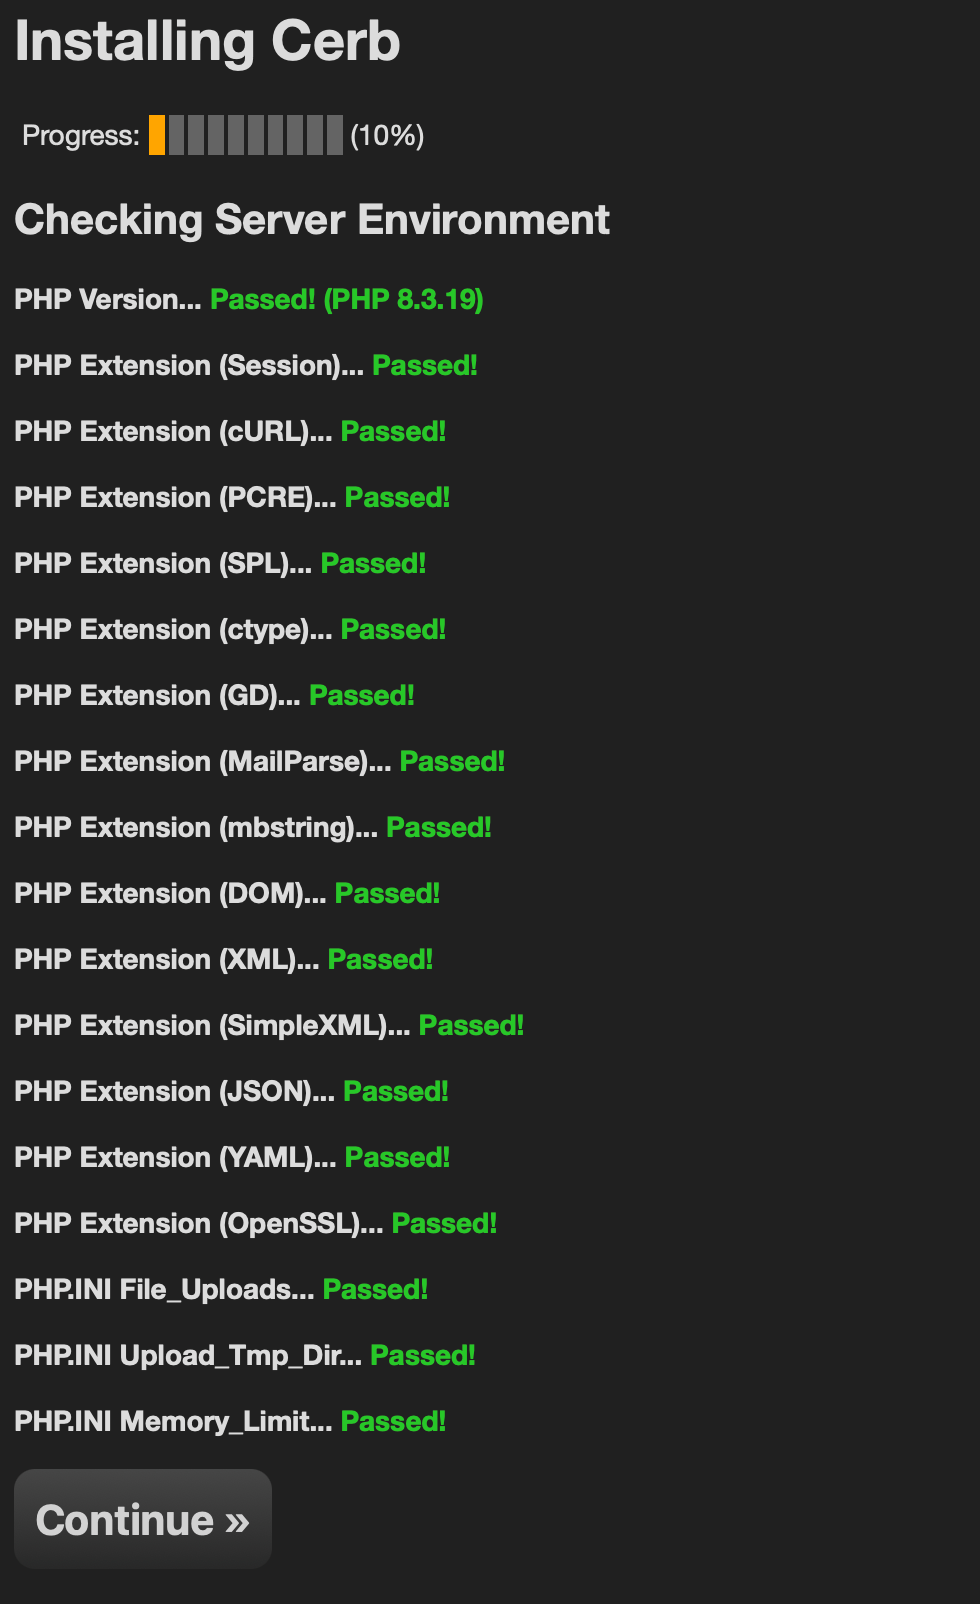
Step 1: Environment
The first step of the installer checks if your server meets the requirements for installing Cerb. Correct any problems before proceeding, and then click the Continue button.
Step 2: License
Review the software license agreement and then click the I Accept button.
Step 3: Database
Driver
Leave this at the default of MySQLi (the MySQL Improved extension).
Cerb currently only supports MySQL1 databases. You can also use one of the MySQL-based forks2, like Amazon Aurora, MariaDB, Percona, or WebScaleSQL. We recommend MySQL or Amazon Aurora, as they receive the most testing.
Engine
MySQL supports many storage engines3 that offer different functionality, strengths, and trade-offs. Of those, Cerb is well-tested with the two most common:
-
InnoDB: This is the default and recommended storage engine in recent versions of MySQL. It is transactional and designed to recover gracefully from unexpected interruptions. It implements row-based locking on writes, which reduces resource contention at scale in high-volume environments. It has slightly higher overhead than MyISAM due to transactions, durability, and indexing. It may require more resources, and more experience to maintain and tune performance.
-
MyISAM: This is the legacy storage engine in MySQL, and it is no longer under active development. It's simpler to configure and maintain than InnoDB, and has slightly less overhead for some workloads (due to being non-transactional), but it risks data loss and corruption when the server is unexpectedly interrupted. It also implements table-based locking on writes, which generally doesn't scale well and may lead to resource contention in high volume environments.
In general, we recommend that you use InnoDB. If you're in an environment that only supports MyISAM, or you just feel more comfortable with it, then go ahead and use it.
You can easily switch between storage engines at any time.
Host
This is the IP or hostname of your MySQL server.
If MySQL is installed on the same server as your web server, this value is usually localhost.
Port
This is the listening port of your MySQL server.
You can leave this blank unless you're running an unusual configuration.
Database Name
The name of the database on the MySQL server that you created earlier with the CREATE DATABASE <database> CHARACTER SET utf8mb4 statement.
Username
The username that you created earlier with the GRANT ALL PRIVILEGES ON <database> TO <user>@host statement.
Password
The password that you created earlier with the CREATE USER <user>@host IDENTIFIED BY '<password>' statement.
Test Settings
Once you've entered your database connection details, click the Test Settings button to verify them.
Saving the configuration file
If the web server has write access to the framework.config.php file then it will automatically handle this for you and skip to the next step.
If it can't write the file, it will generate the file for you to manually copy and paste.
Initializing the database
The installer will automatically create your initial database schema. This may take a moment depending on the resources available to your database server.
Step 4: Account
This screen is headed Create Your Admin Account. In this step you'll create the administrator account that you use to log in, and set the shared address Cerb replies from.
Name
Enter your first and last name.
Email Address
Your personal email address. This is how you will authenticate during logins, and it's where your notifications and account recovery details will be sent. For that reason, this should not be an email address managed by Cerb.
This will likely be something like you@company.com or you@gmail.com.
Password
It is recommended that you choose a strong password here that you don't use anywhere else. It should be fairly long, contain a mix of alphanumeric characters and symbols, in both upper and lower cases.
We highly recommend using a password manager like 1Password4 to maintain strong password security practices. You can also enable two-factor authentication for even stronger security.
Timezone
Cerb will use your timezone setting to display and interpret dates using your local timezone. The installer attempts to automatically detect this for you, but you can adjust it as necessary.
Default Sender
This establishes your first shared outgoing email address. You'll probably want to use something like support@example.com (where example.com is your own domain name).
You can also configure a personalized name for the email address, such as your organization name.
For everything to work properly, this email address absolutely must route back into Cerb so that you receive new messages. This is usually accomplished by configuring a POP/IMAP mailbox for Cerb to download mail from.
Once you're done, click the Continue button.
Step 5: Packages
This screen is headed Choose Environment. Demo / Development is selected for you.
| Environment | |
|---|---|
| Demo / Development | "Cerb will be configured for demonstration, development, and testing with sample data." Sample records are created for tickets, contacts, and organizations. This test data can be removed later by deleting the cerb.demo.data workflow. |
| Production | "Cerb will be configured for real-world use with a clean database." |
Select an environment and click the Install button.
Step 6: Complete
The last step is a single screen headed Installation Complete. There's no Continue button on it – everything below is on that one page:
Cerb has been successfully installed and configured.

Security Notice: Delete the install directory before going to production.

You are now using a Community License with full functionality, unlimited workers,
three concurrency slots, and no time limit.

Once you purchase a license, you can install it from Setup >> Configure >> License.

Log in and get started
Community License
Without a subscription, Cerb runs on a Community License: full functionality, unlimited workers, three concurrency slots, and no time limit. What a subscription raises is concurrency – how much work the installation runs at once.
You can install a purchased subscription in Setup » Configure » Subscription.
Finishing up
That's it! You're ready to start using Cerb.
Log in and get started is a link rather than a button.
If this is a production installation, you need to delete the /install/ directory since it is no longer necessary and it provides access to some sensitive information about your environment.
If this is a development installation, you may leave the /install/ directory in place since it contains useful scripts and examples for plugin development.
On Docker, that Security Notice can't be followed as written. The
install directory lives inside the container image, not on your disk, so there's
nothing on your machine to delete. Set CERB_INSTALL to anything but
yes and restart instead -- see
after the installer. That's the
remediation on that path, and a reader who goes looking for a directory won't find one and may
conclude they're already safe.
If the installer says the installation already exists
Running the installer against a database that already holds a Cerb schema doesn't repeat the wizard. It goes straight to a screen headed Existing Installation Detected, with all six steps shown as completed.
You'll land here if an earlier attempt got as far as initializing the database and then stopped. That's worth knowing because the administrator account isn't written until you click Install on the Packages step – an install abandoned before then leaves a populated schema with no workers in it, which is a state the installer won't walk you out of. Recovering it means starting from an empty database.
On Docker, docker compose down --volumes is what gives you one.